Oven to Air Fryer Conversion: The Real Formula, Chart & Tips
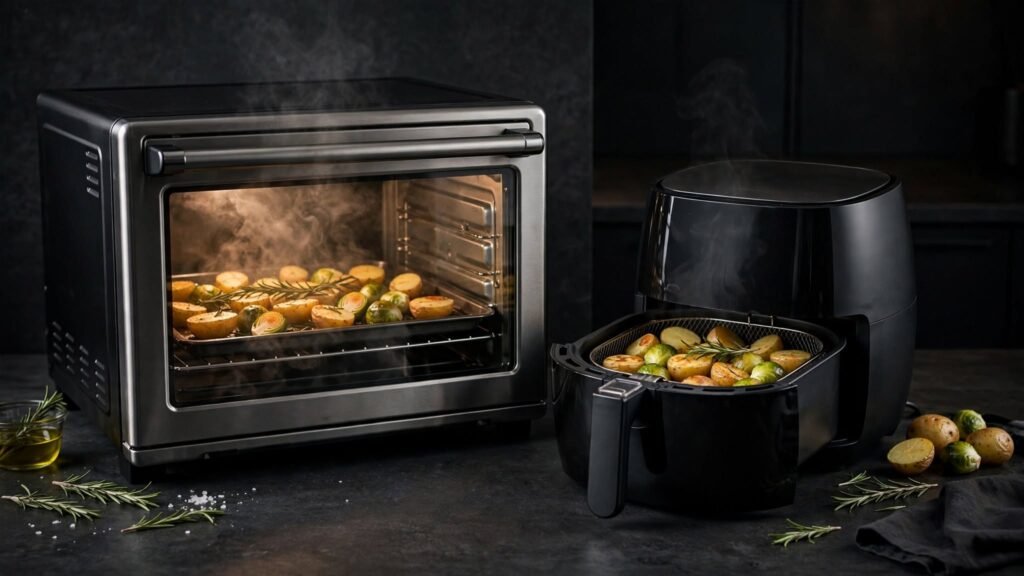
Oven to Air Fryer Conversion recipe to an air fryer usually means making two changes: lowering the temperature and shortening the cooking time.
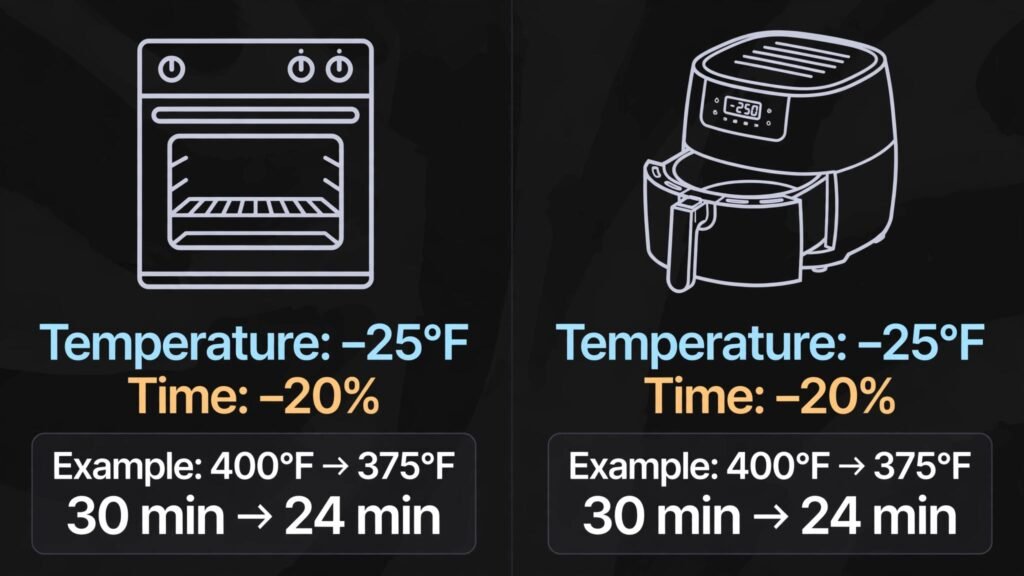
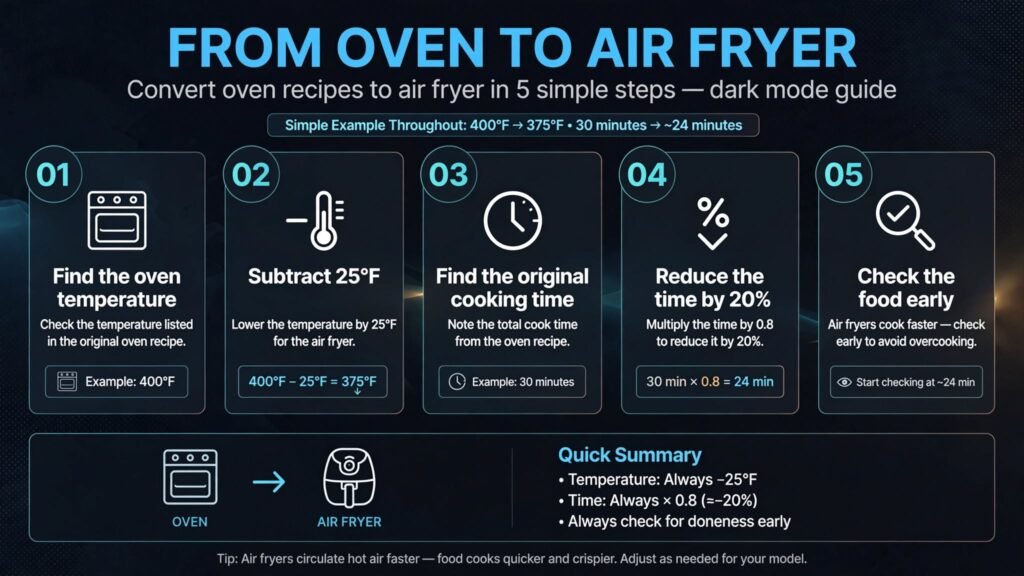
For many recipes written for a conventional oven, a useful starting point is to reduce the temperature by 25°F and the cooking time by about 20%. For example, a recipe calling for 400°F for 30 minutes would start at about 375°F for 24 minutes. Whirlpool gives the same general guideline while noting that results can vary between recipes and air fryer models.
That formula is a starting point, not a guarantee.
Food thickness, quantity, basket design, airflow and the original cooking method can all affect the final result. The best approach is to use the conversion to set your starting temperature and time, then check the food before the calculated time is complete.
The Basic Oven-to-Air-Fryer Formula
For a recipe written for a conventional oven, start with:
Air fryer temperature = oven temperature − 25°F
Air fryer cooking time = oven cooking time × 0.8
Example
Suppose the original oven recipe calls for:
400°F for 30 minutes
Temperature:
400°F − 25°F = 375°F
Time:
30 × 0.8 = 24 minutes
Your starting air fryer setting would therefore be:
375°F for about 24 minutes
Begin checking before the 24-minute mark. If the food needs more time, continue cooking and check again.
Whirlpool also gives a 25°F temperature reduction and 20% time reduction as a general air-fryer conversion guideline.
Why Does an Air Fryer Need Less Time?
An air fryer uses a relatively small cooking chamber with rapidly circulating hot air. That moving air helps transfer heat to the surface of the food and encourages browning and crisping.
This is why an oven recipe can sometimes finish sooner in an air fryer.
But it is important not to interpret the formula as meaning that every air fryer is literally 25°F hotter than an oven. The 25°F reduction is simply a practical starting adjustment for adapting certain oven recipes to air-fryer cooking.
The actual result depends on the food and appliance.
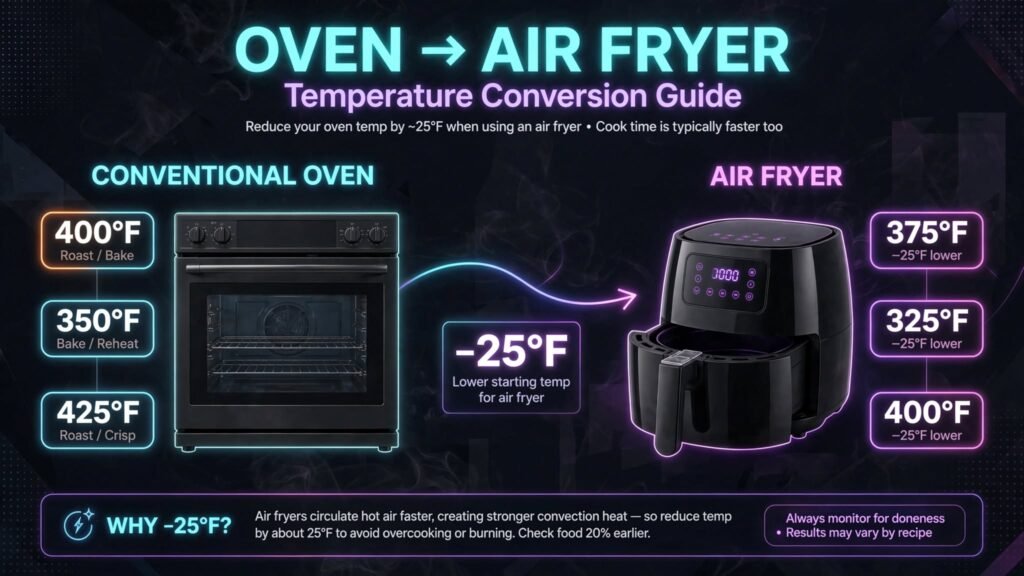
Oven-to-Air-Fryer Temperature Conversion Chart
Use this chart as a starting reference, not as a universal rule.
| Oven Temperature | Air Fryer Starting Temperature |
|---|---|
| 300°F | 275°F |
| 325°F | 300°F |
| 350°F | 325°F |
| 375°F | 350°F |
| 400°F | 375°F |
| 425°F | 400°F |
| 450°F | 425°F |
The temperatures above follow the general 25°F reduction guideline. Whirlpool notes that air-fryer results can vary by recipe and appliance.
Oven-to-Air-Fryer Time Conversion Chart
For the basic 20% time reduction:
| Oven Cooking Time | Air Fryer Starting Time |
|---|---|
| 10 minutes | 8 minutes |
| 15 minutes | 12 minutes |
| 20 minutes | 16 minutes |
| 25 minutes | 20 minutes |
| 30 minutes | 24 minutes |
| 40 minutes | 32 minutes |
| 50 minutes | 40 minutes |
| 60 minutes | 48 minutes |
These are calculated starting points. They do not mean the food will always be perfectly cooked at the listed time.
How to Convert an Oven Recipe Step by Step
You do not need a complicated calculator.
1. Find the oven temperature
Look at the temperature given in the original recipe.
For example:
400°F
2. Subtract 25°F
400°F − 25°F = 375°F
3. Find the original cooking time
Suppose the recipe calls for:
30 minutes
4. Reduce the cooking time by 20%
Multiply the original time by 0.8:
30 × 0.8 = 24 minutes
5. Start checking early
Set the air fryer for approximately 24 minutes, but check the food before that time is finished.
If it is not ready, continue cooking.
This last step matters because a formula cannot account for every food thickness, portion size, basket design or air fryer model.
What If the Recipe Was Written for a Convection Oven?
This is where simple conversion charts can become misleading.
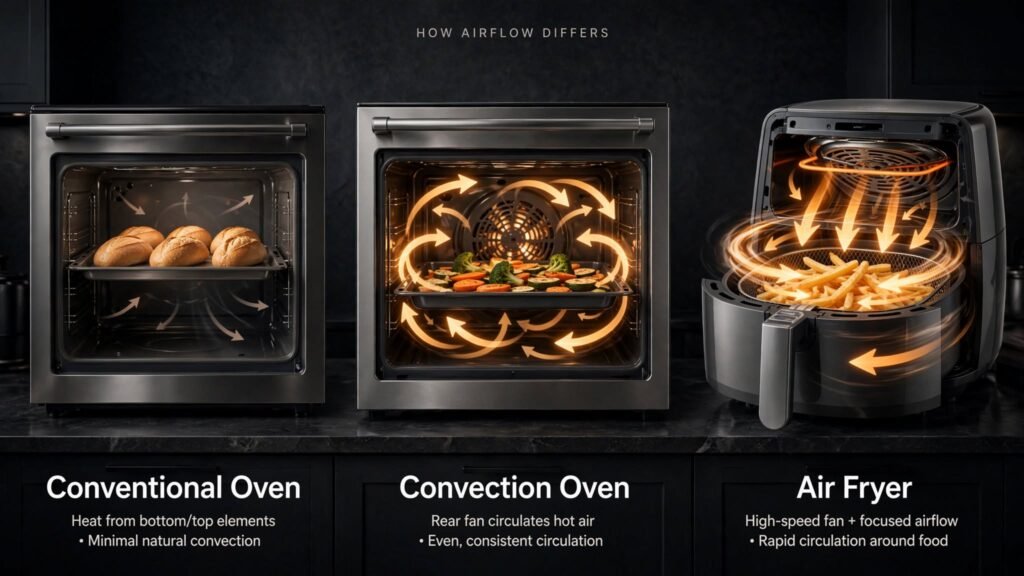
A convection oven already uses a fan to circulate hot air. An air fryer also uses circulating air, although its cooking chamber and airflow pattern are different.
For that reason, you should not automatically apply the full 25°F and 20% reduction to a recipe that was specifically written for convection cooking.
Instead, use the original recipe as your starting point and monitor the food closely.
The important distinction is whether the original recipe was written for a conventional oven or a convection oven. A conventional-oven recipe may need the general adjustment, while a convection recipe has already been designed around circulating air.
USDA also recognizes temperature adjustments when using convection cooking, which reinforces the fact that cooking method matters when adapting recipes.
When the Basic Formula Needs Extra Care
The 25°F and 20% guideline is useful, but the type of food matters more than the calculation.
Thin foods
Thin foods can cook and brown quickly because heat reaches the center relatively fast.
Examples include:
- Thin potato slices
- Small breaded foods
- Thin vegetables
- Small pastries
For these foods, start checking early.
Thick foods
Thicker foods may brown on the outside before the center is fully cooked.
This is particularly important with thick cuts of meat and poultry.
Do not judge doneness from surface color alone. When food safety depends on internal temperature, use a food thermometer.
Sugary or glazed foods
Sugar, honey and sweet glazes can darken quickly.
If the surface is browning too rapidly while the center still needs more cooking, reducing the temperature can help slow the browning.
Frozen foods
There is no single percentage that reliably converts every frozen food.
Frozen fries, chicken pieces, vegetables and packaged foods differ in size, composition and preparation.
If the package provides specific air-fryer instructions, those directions are usually a better starting point than converting the oven instructions yourself.
Air Fryer Size and Basket Load Matter
Two air fryers can produce different results from the same recipe.
Basket-style air fryers generally have a compact cooking area, while larger air-fryer ovens may have multiple racks and considerably more space.
The amount of food matters too.
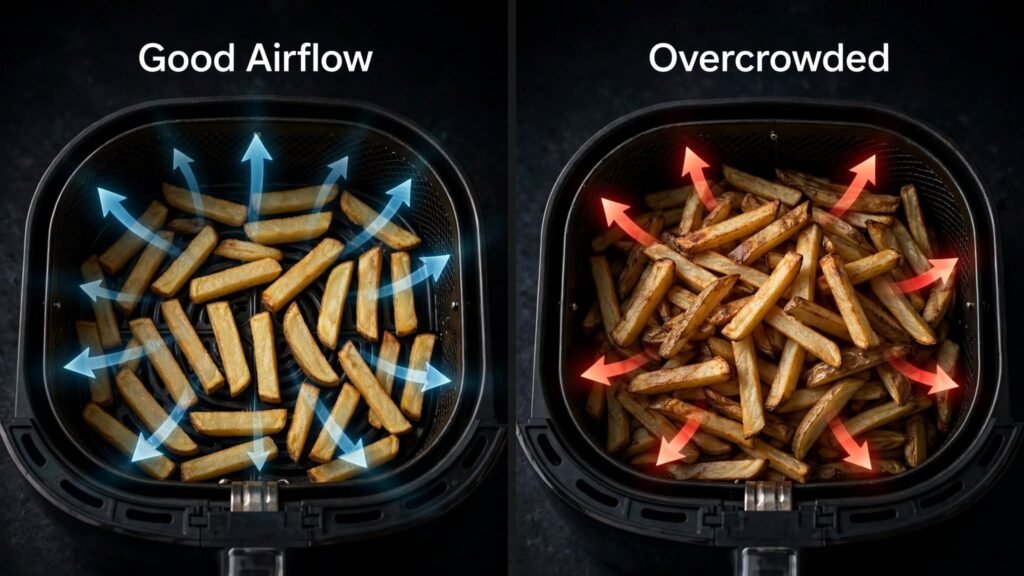
If the basket is overcrowded, hot air has less room to circulate around the food. This can lead to uneven browning and less crisping.
For foods where airflow is important, arrange the food in as close to a single layer as practical.
If the quantity is too large for the basket, cook in batches rather than simply adding more cooking time.
Adding time may cook the food through, but it does not solve the airflow problem.
Should You Preheat the Air Fryer?
There is no single preheating rule that applies to every air fryer.
Some manufacturers and recipes recommend preheating, while others do not.
If the original recipe or your air fryer manual specifies preheating, follow those instructions.
When converting a recipe, the important thing is consistency. If you use a preheated air fryer for one attempt and a cold-start air fryer for another, the cooking time may change even if everything else stays the same. for preheat check this article : How to preheat an air fryer.
How Early Should You Check the Food?
When converting a recipe for the first time, check it before the calculated cooking time is finished.
For example:
Original: 400°F for 30 minutes
Starting conversion: 375°F for 24 minutes
Rather than waiting until minute 24, check around 20 minutes.
If the food needs more time, continue cooking.
If it is already done, you have avoided overcooking it.
Once you know how your particular air fryer behaves with that food, you can make the timing more predictable the next time.
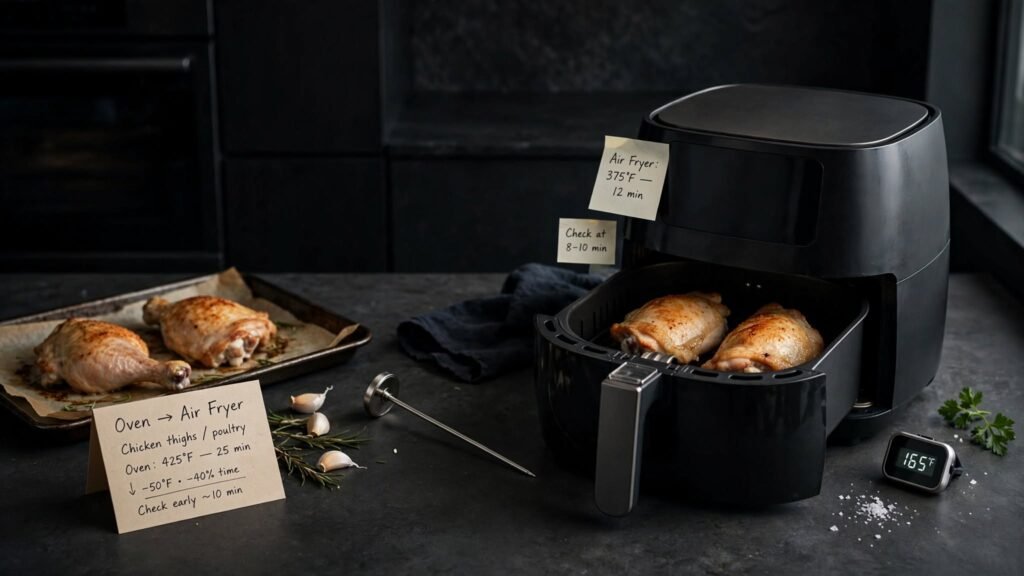
Don’t Use Cooking Time Alone for Poultry
Cooking time is an estimate. For poultry, internal temperature is the important safety check.
The USDA recommends that all poultry reach a minimum internal temperature of 165°F (73.9°C), measured with a food thermometer.
Color is not a reliable way to determine whether poultry is safely cooked. Poultry can remain pink or change color in different ways even after reaching a safe temperature.
For chicken, turkey and other poultry:
Use the conversion to estimate the cooking time, but use a food thermometer to verify safe doneness.
This principle is more important than any oven-to-air-fryer time chart.
Common Oven-to-Air-Fryer Conversion Mistakes
Using the original oven temperature and time
A direct one-to-one conversion ignores the differences between the two cooking environments.
Start with an adjusted temperature and time instead.
Treating 25°F and 20% as an exact formula
It is not.
It is a useful starting guideline. Food type, thickness, quantity and appliance design can change the result.
Applying the full adjustment to a convection recipe
A convection recipe already uses circulating hot air, so automatically applying the full conventional-oven adjustment may change the cooking conditions more than necessary.
Overcrowding the basket
Crowding reduces the space available for hot air to circulate.
If possible, cook in batches.
Waiting for the exact converted time
The calculated time is an estimate.
Check the food early.
Judging poultry by color
Brown or golden skin does not tell you whether poultry has reached a safe internal temperature.
Use a thermometer instead.
A Real Oven-to-Air-Fryer Conversion Example
Suppose an oven recipe calls for:
425°F for 40 minutes
Start with the temperature:
425°F − 25°F = 400°F
Then calculate the time:
40 × 0.8 = 32 minutes
Your starting point is therefore:
400°F for about 32 minutes
But 32 minutes is not a guarantee.
Check the food before that point. If it is browning quickly, monitor the surface. If the food is thick and the center needs more time, continue cooking until it is properly done.
The conversion sets the starting conditions. It does not replace checking the food.
Quick Conversion Examples
| Oven Recipe | Air Fryer Starting Point |
|---|---|
| 350°F for 20 minutes | 325°F for 16 minutes |
| 375°F for 25 minutes | 350°F for 20 minutes |
| 400°F for 30 minutes | 375°F for 24 minutes |
| 400°F for 40 minutes | 375°F for 32 minutes |
| 425°F for 30 minutes | 400°F for 24 minutes |
| 425°F for 40 minutes | 400°F for 32 minutes |
| 450°F for 20 minutes | 425°F for 16 minutes |
Again, these are starting points based on the general conversion guideline, not guaranteed cooking instructions.
Can You Convert Every Oven Recipe to an Air Fryer?
No.
Many foods that benefit from dry, circulating heat can adapt well to an air fryer.
However, some recipes depend heavily on equipment or cooking conditions that are difficult to reproduce in a basket-style air fryer.
Conversion can be difficult when a recipe requires:
- A large baking pan
- A substantial amount of liquid
- Wet batter
- Very large quantities
- Long, gentle cooking
- A particular baking environment
- Enough space for dough or batter to rise
Some air fryers have bake settings and accessories that make these foods easier to prepare. Whirlpool, for example, notes that certain air fryers can be used for foods such as cakes and quiche when using an appropriate bake setting.
If the recipe depends heavily on a full-size baking dish or large cooking volume, using an air-fryer-specific recipe may be the better option.
Can You Convert an Air Fryer Recipe Back to the Oven?
Yes, but do not simply reverse the 25°F and 20% calculation.
An air fryer recipe may have been developed around a particular basket size, airflow pattern and food arrangement.
When moving the recipe to an oven, first determine what type of oven you are using:
- Conventional oven
- Convection oven
- Oven with an air-fry setting
- Full-size oven with a shallow pan
- Oven using a perforated rack or basket
The setup affects how much hot air reaches the food.
If you already have a conventional-oven recipe for the same food, that recipe is usually a better starting point than trying to reverse-engineer an air-fryer recipe.
Frequently Asked Questions
What is the basic oven-to-air-fryer conversion?
For many conventional-oven recipes, start by reducing the temperature by 25°F and the cooking time by about 20%. Whirlpool gives this as a general guideline and notes that results vary by recipe and air fryer.
What does 400°F in an oven become in an air fryer?
Using the basic 25°F reduction, 400°F becomes 375°F as a starting temperature.
What does 30 minutes in an oven become in an air fryer?
Using a 20% time reduction:
30 × 0.8 = 24 minutes
So 30 minutes becomes approximately 24 minutes as a starting point.
Do I always reduce both the temperature and cooking time?
The common guideline does, but the result is not universal. Food thickness, quantity, appliance design and the original cooking method can all affect the final result.
Is the conversion different for convection ovens?
Yes. A convection oven already circulates hot air, so you should not automatically apply the full conventional-oven adjustment to a recipe specifically written for convection.
Should I use the same conversion for frozen food?
Not automatically. Frozen foods vary considerably. If the package provides air-fryer instructions, use those directions when available.
Why did my converted food cook too quickly?
The food may be thin, the basket may be lightly loaded, or your particular air fryer may transfer heat differently from the appliance used for the original recipe.
Check earlier the next time you make it.
Why is my converted food still undercooked?
The food may be thicker than expected, the basket may be crowded, or the original recipe may have been designed for a different type of oven.
Continue cooking as needed and use an internal thermometer when food safety depends on temperature.
Can every oven recipe be converted?
No. Recipes involving large quantities of liquid, wet batter, large baking equipment or specialized cooking conditions may not translate well to a basket-style air fryer.
Final conclusion
The easiest starting point for converting a conventional-oven recipe to an air fryer is:
Lower the temperature by about 25°F and reduce the cooking time by about 20%.
For example:
400°F for 30 minutes → 375°F for about 24 minutes
But don’t treat that calculation as a law.
Thin foods may finish much earlier. Thick foods may need longer. A crowded basket can affect airflow, and a recipe written for a convection oven may need a different approach.
Most importantly, cooking time is an estimate, not a food-safety measurement. For poultry, USDA recommends a minimum internal temperature of 165°F (73.9°C) measured with a food thermometer.